Pressbase allows you to send a post to all or only selected segments of your newsletter subscribers easily.
Step 1
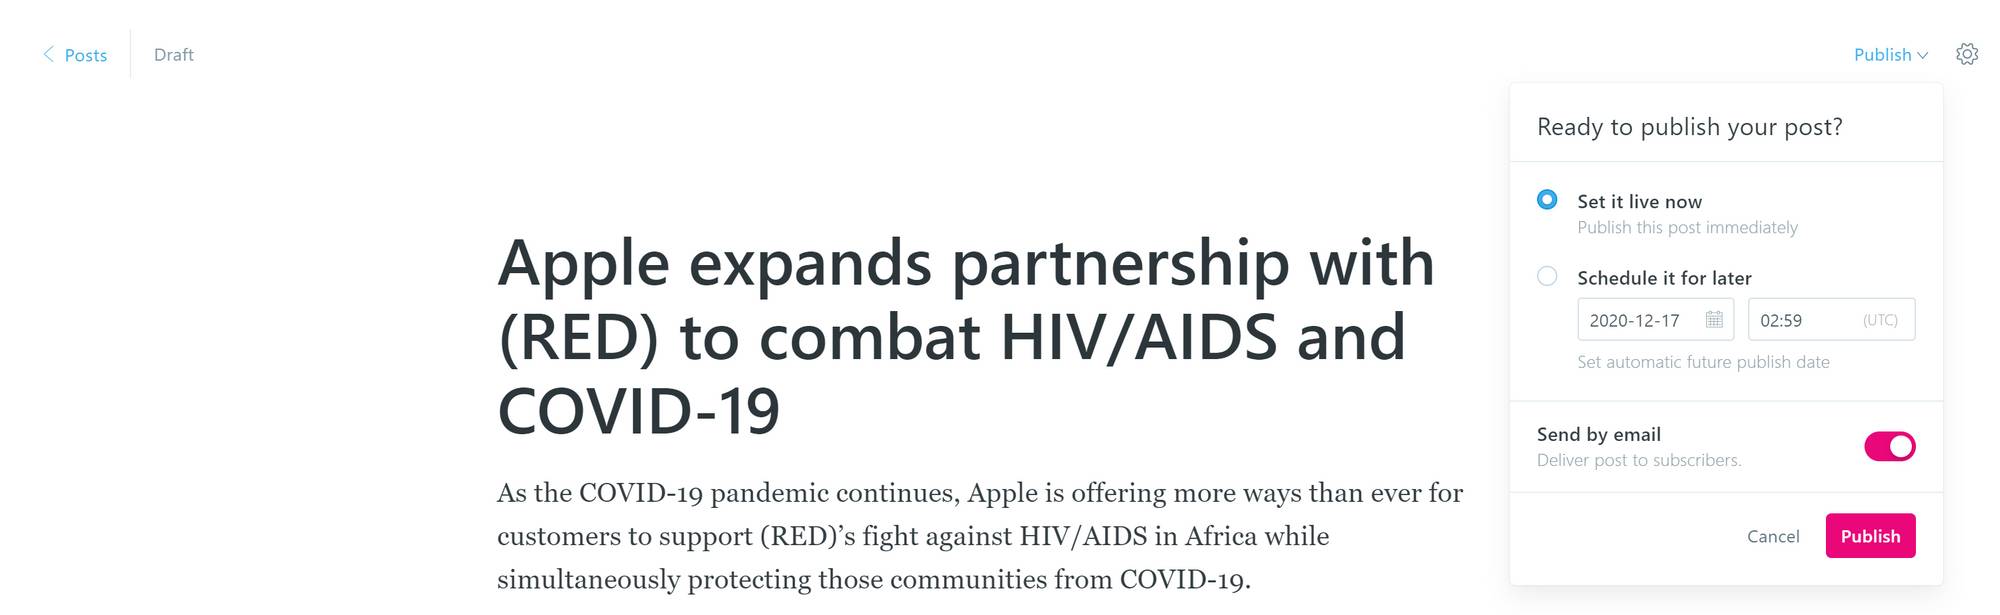
Go to your Newsroom admin > open a post you want to send > click Publish at the top right corner > Turn on Send by email. If you want to send the newsletter at a scheduled time, please choose Schedule it for later and choose the date and the time.
Click Publish to continue.
Step 2
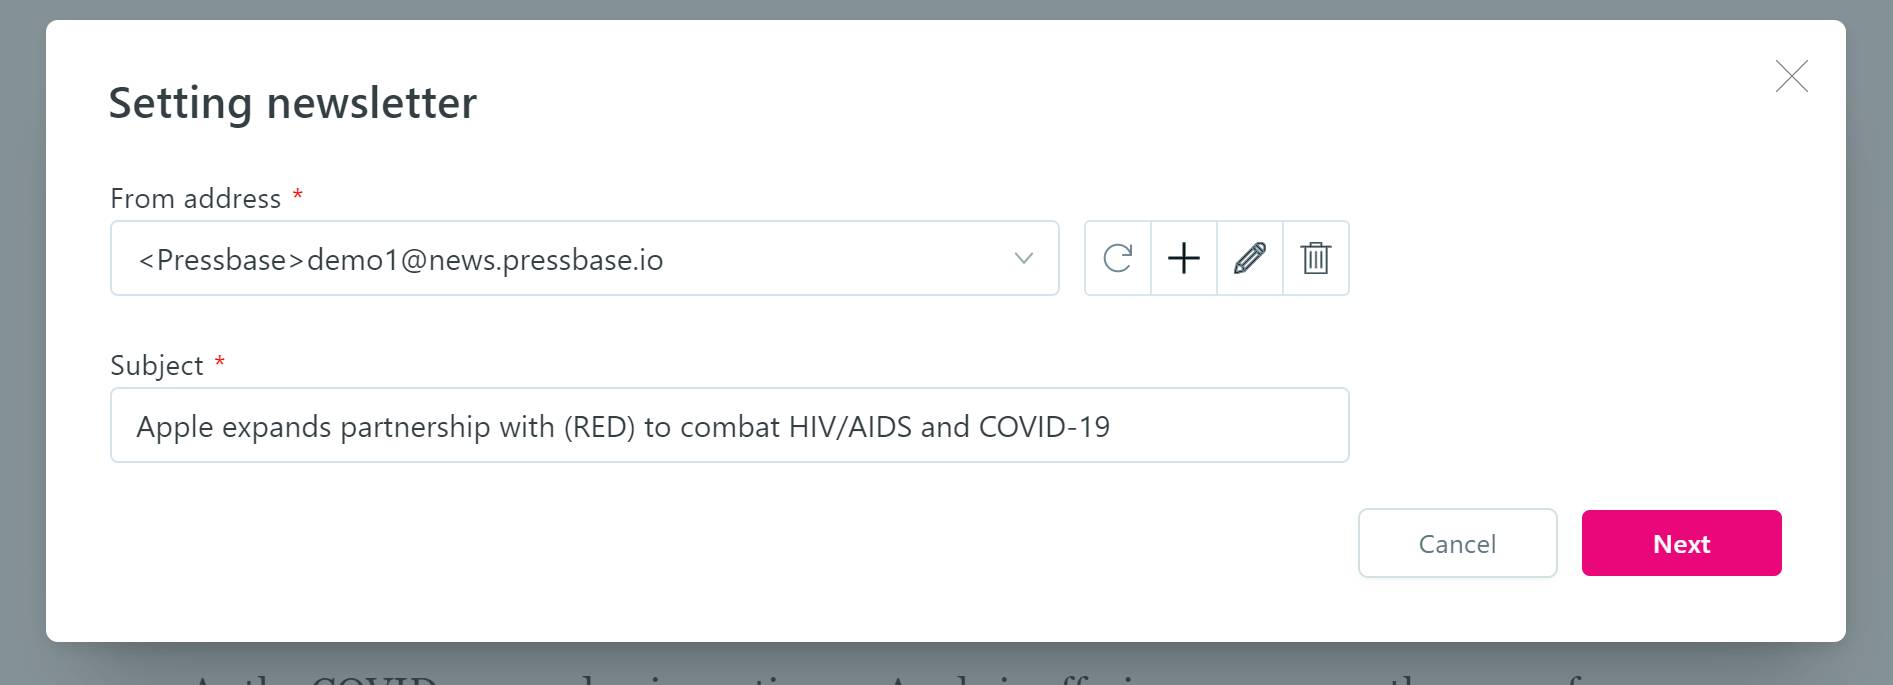
Setting up the From address and Subject line for the email. From address is the sender information your recipients will see in their email client. You can use the default @news.pressbase.io address or add your own address. If you decided to use your own email address, it's recommended to use a business email address. Free email accounts like Yahoo and Gmail are known to have problems due to technical restrictions that affect all newsletter software.
Step 3
Choose the recipients for your newsletter. There are three filters (Type, Source and Tags) to help you send the newsletter to the ones that matter or are relevant. You can learn more about the filters here.
Any subscriber that has the Bounced, Complained or Unsubscribed type will be excluded.
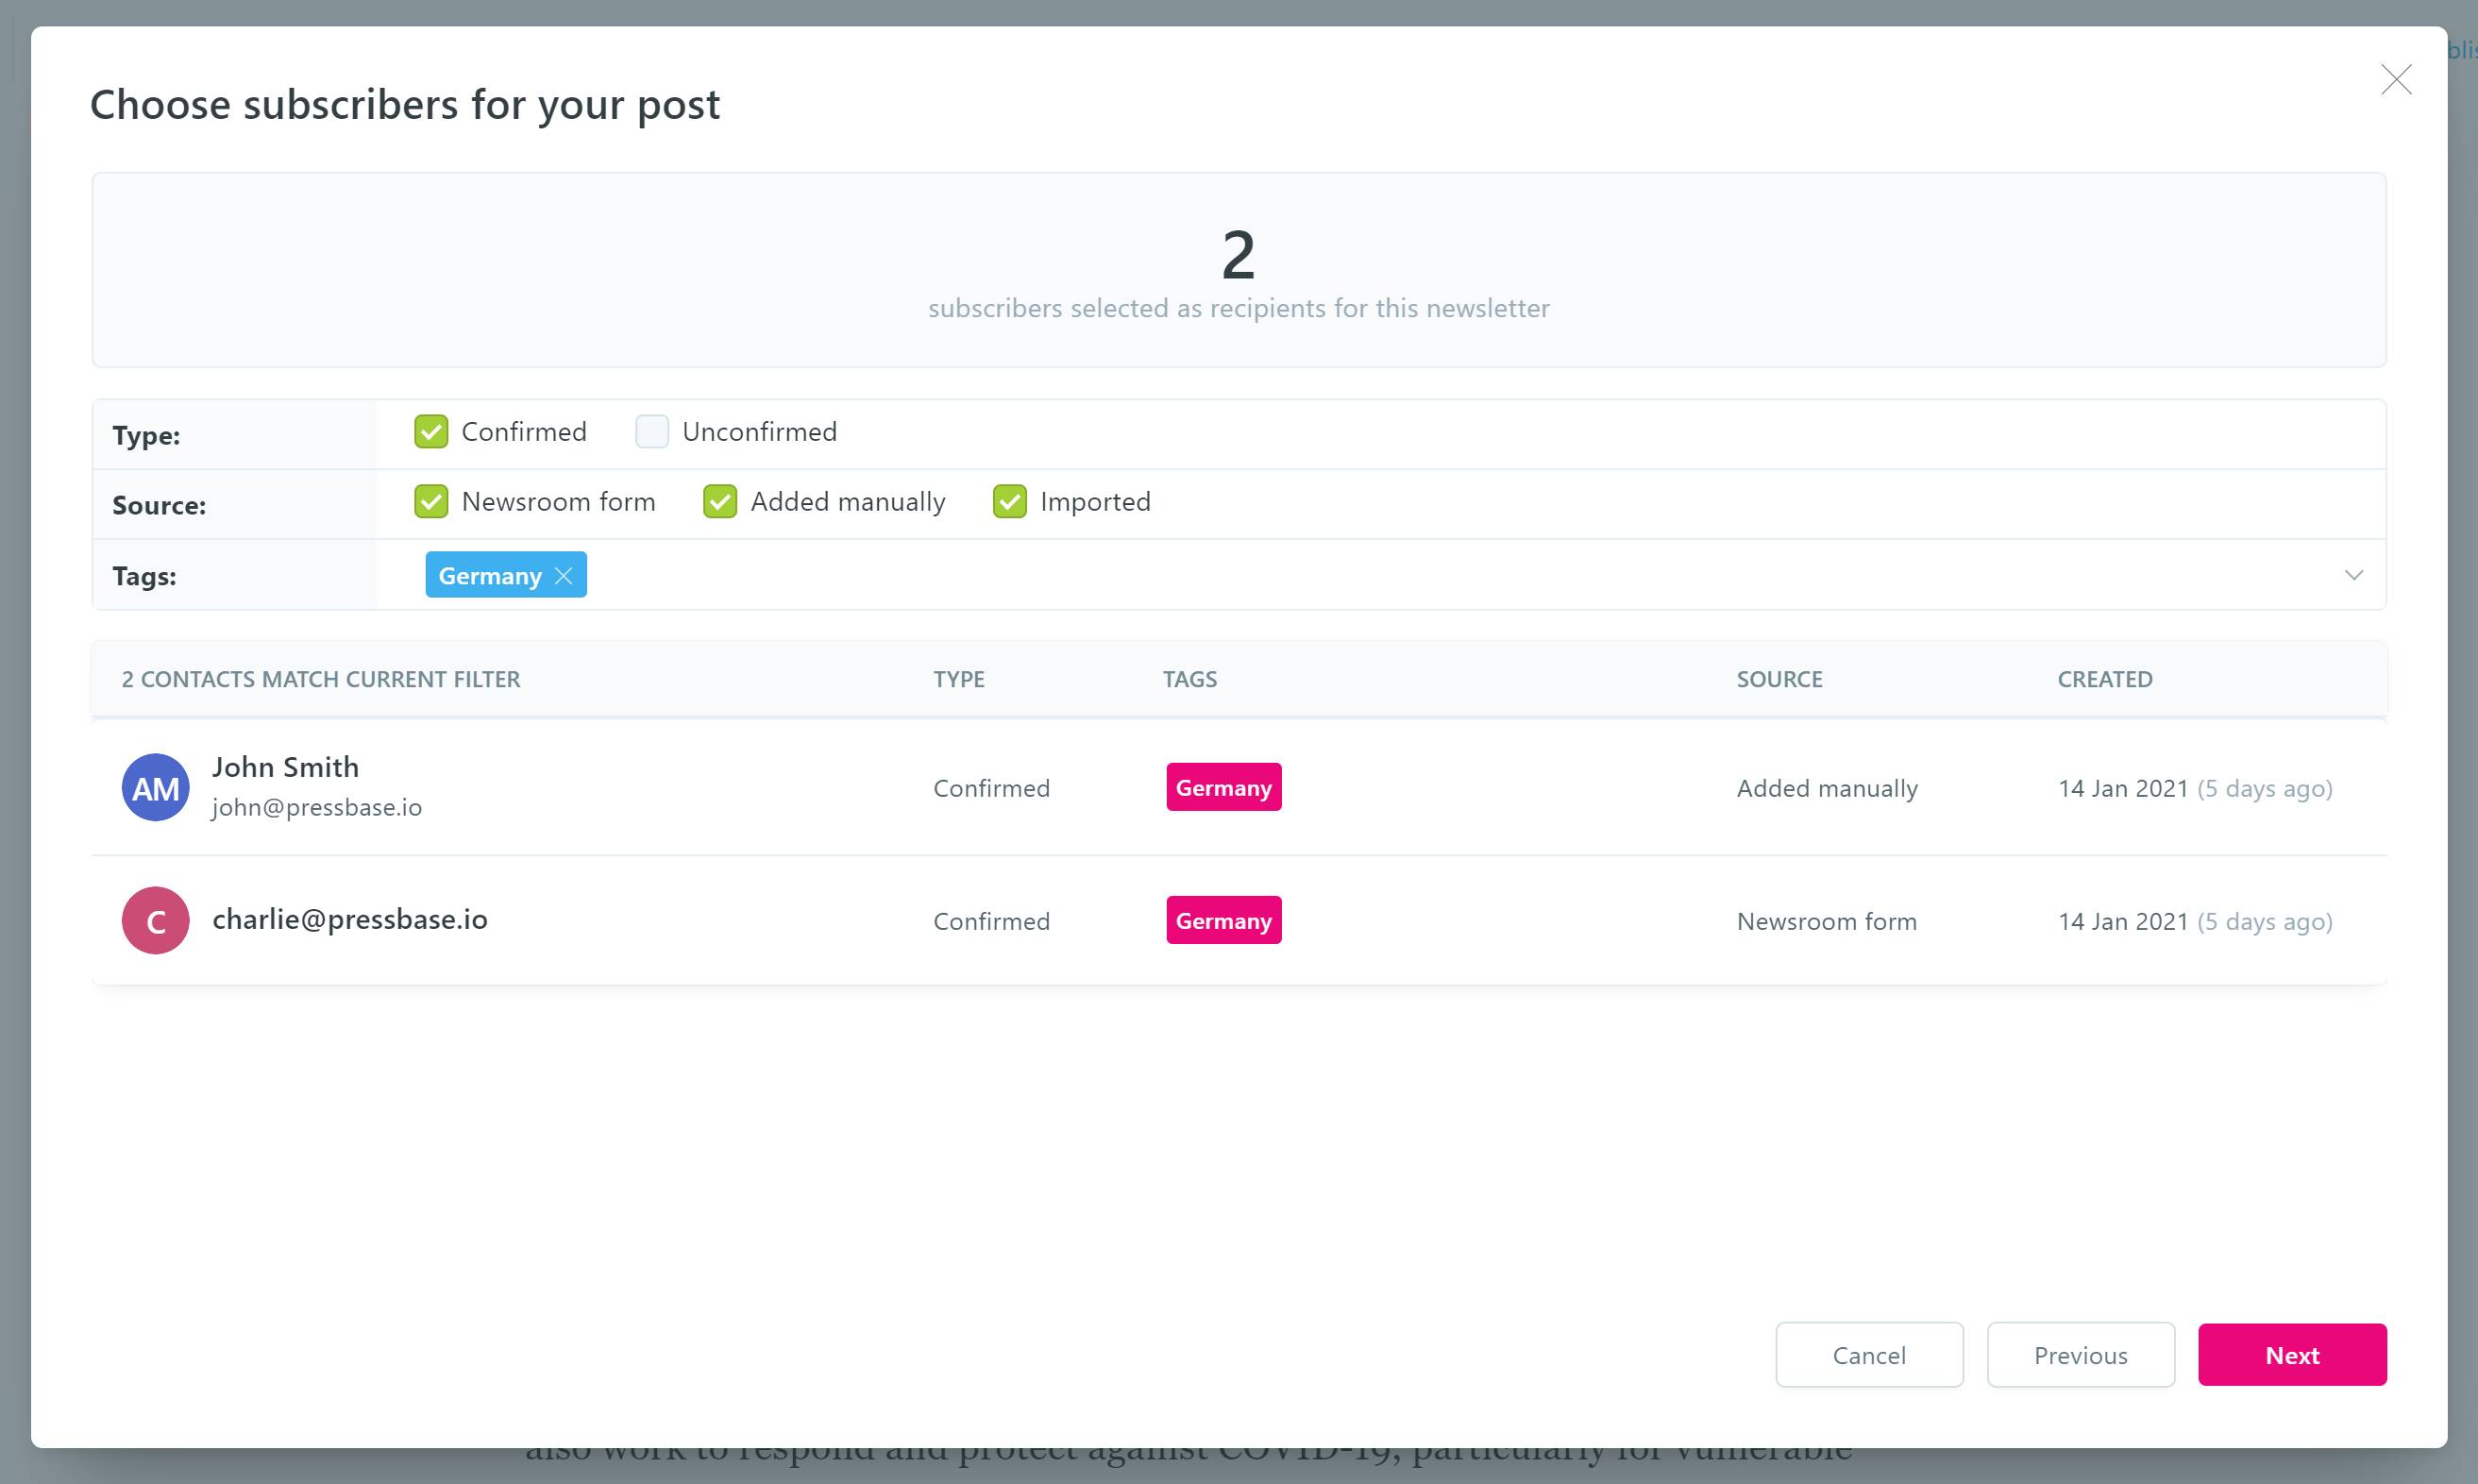
Example use case:
Your newsroom is a multi-language newsroom, and you have a Germany press release that you only want to send to the subscribers who subscribed to your newsletter from your Germany newsroom. Then you can select the Newsroom form source, and the Germany tag.
Click Next to continue.
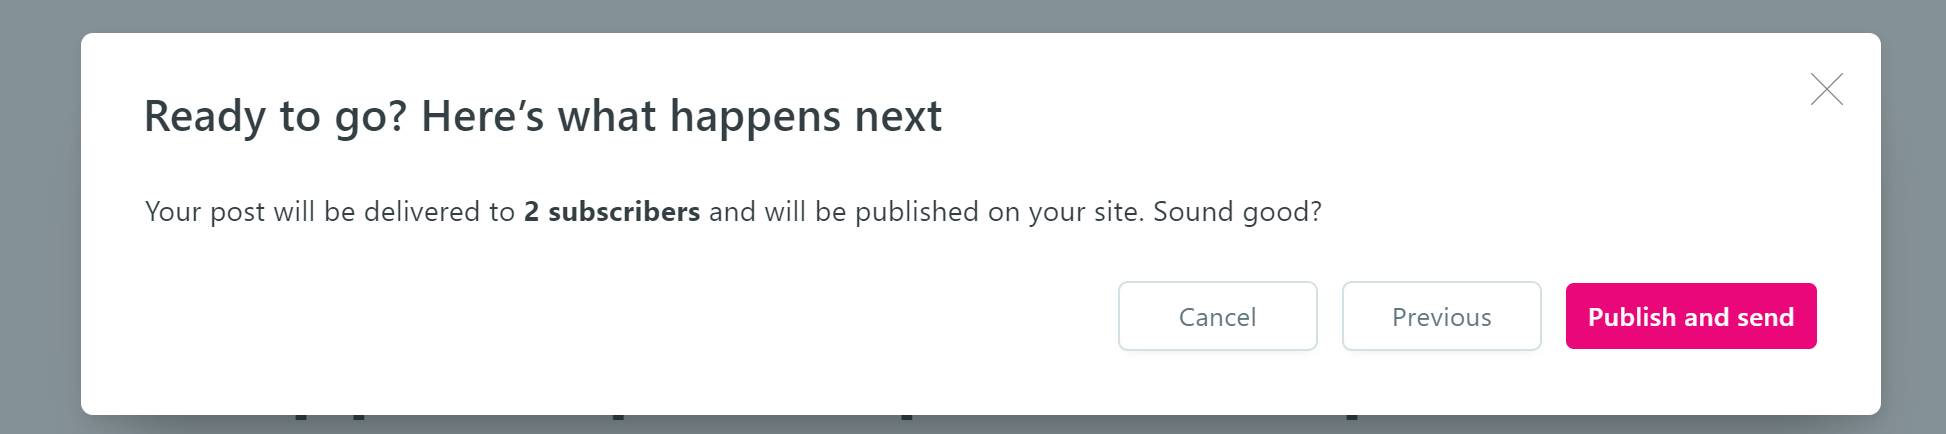
Step 4
Click Publish and send and the newsletter will be sent to according to your schedule and settings.
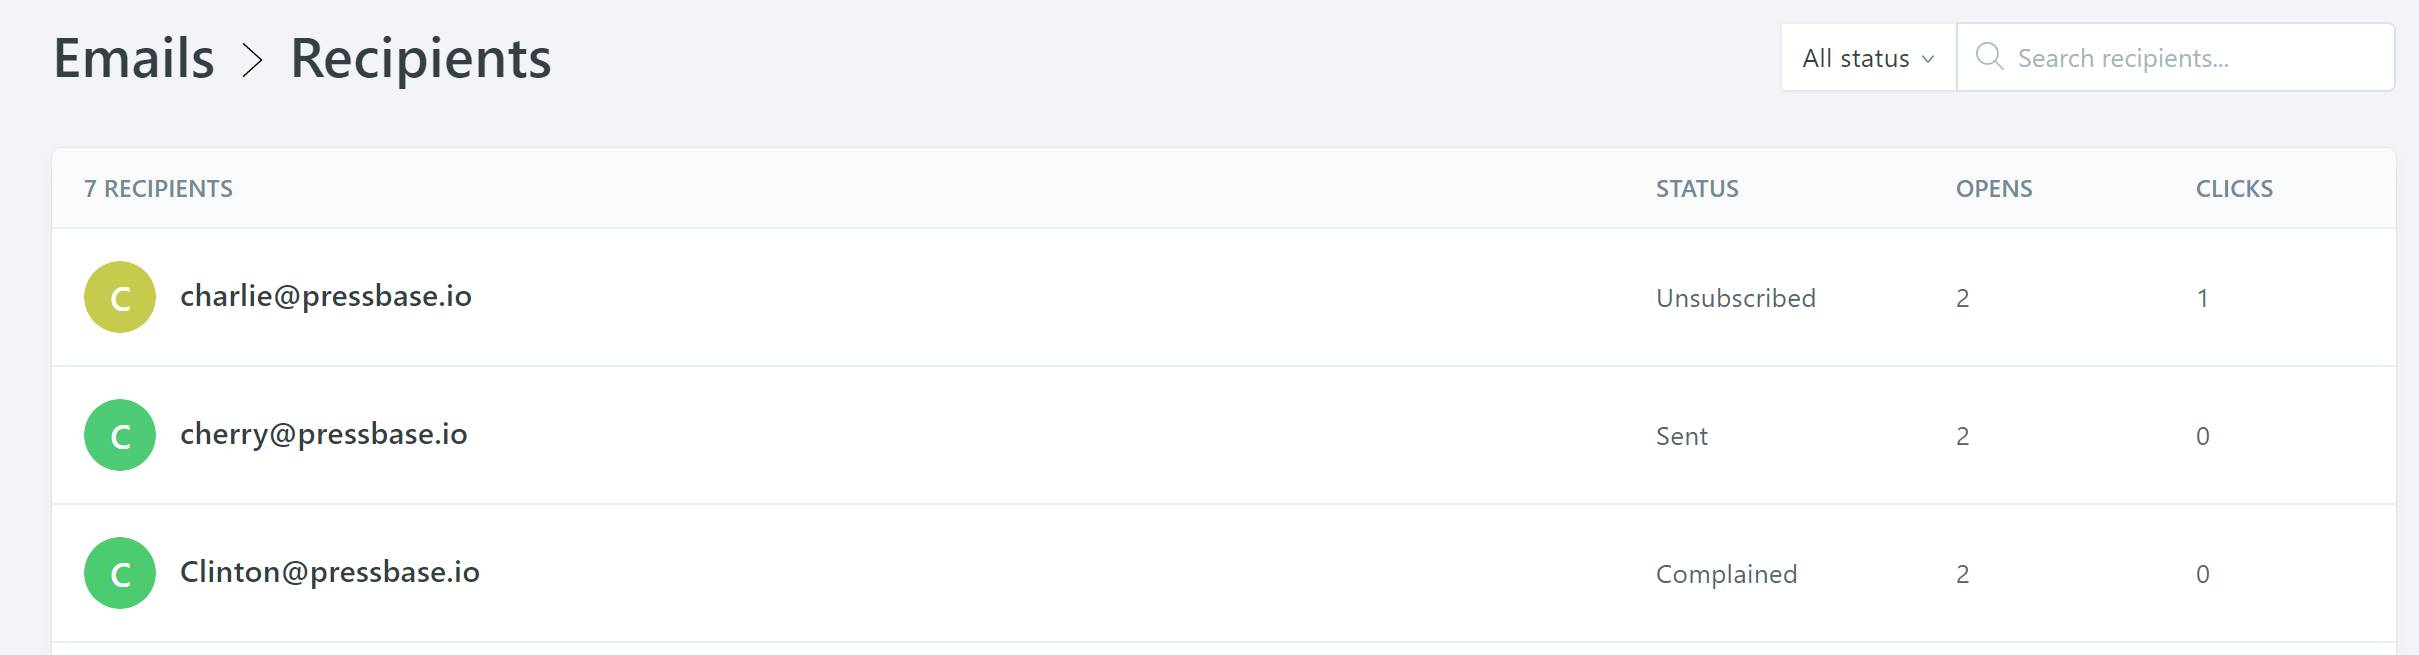
View newsletter stats
Once delivered, you can view the stats like reads and clicks for the email in Newsletter > Emails. Click on any stat to open the detailed view.
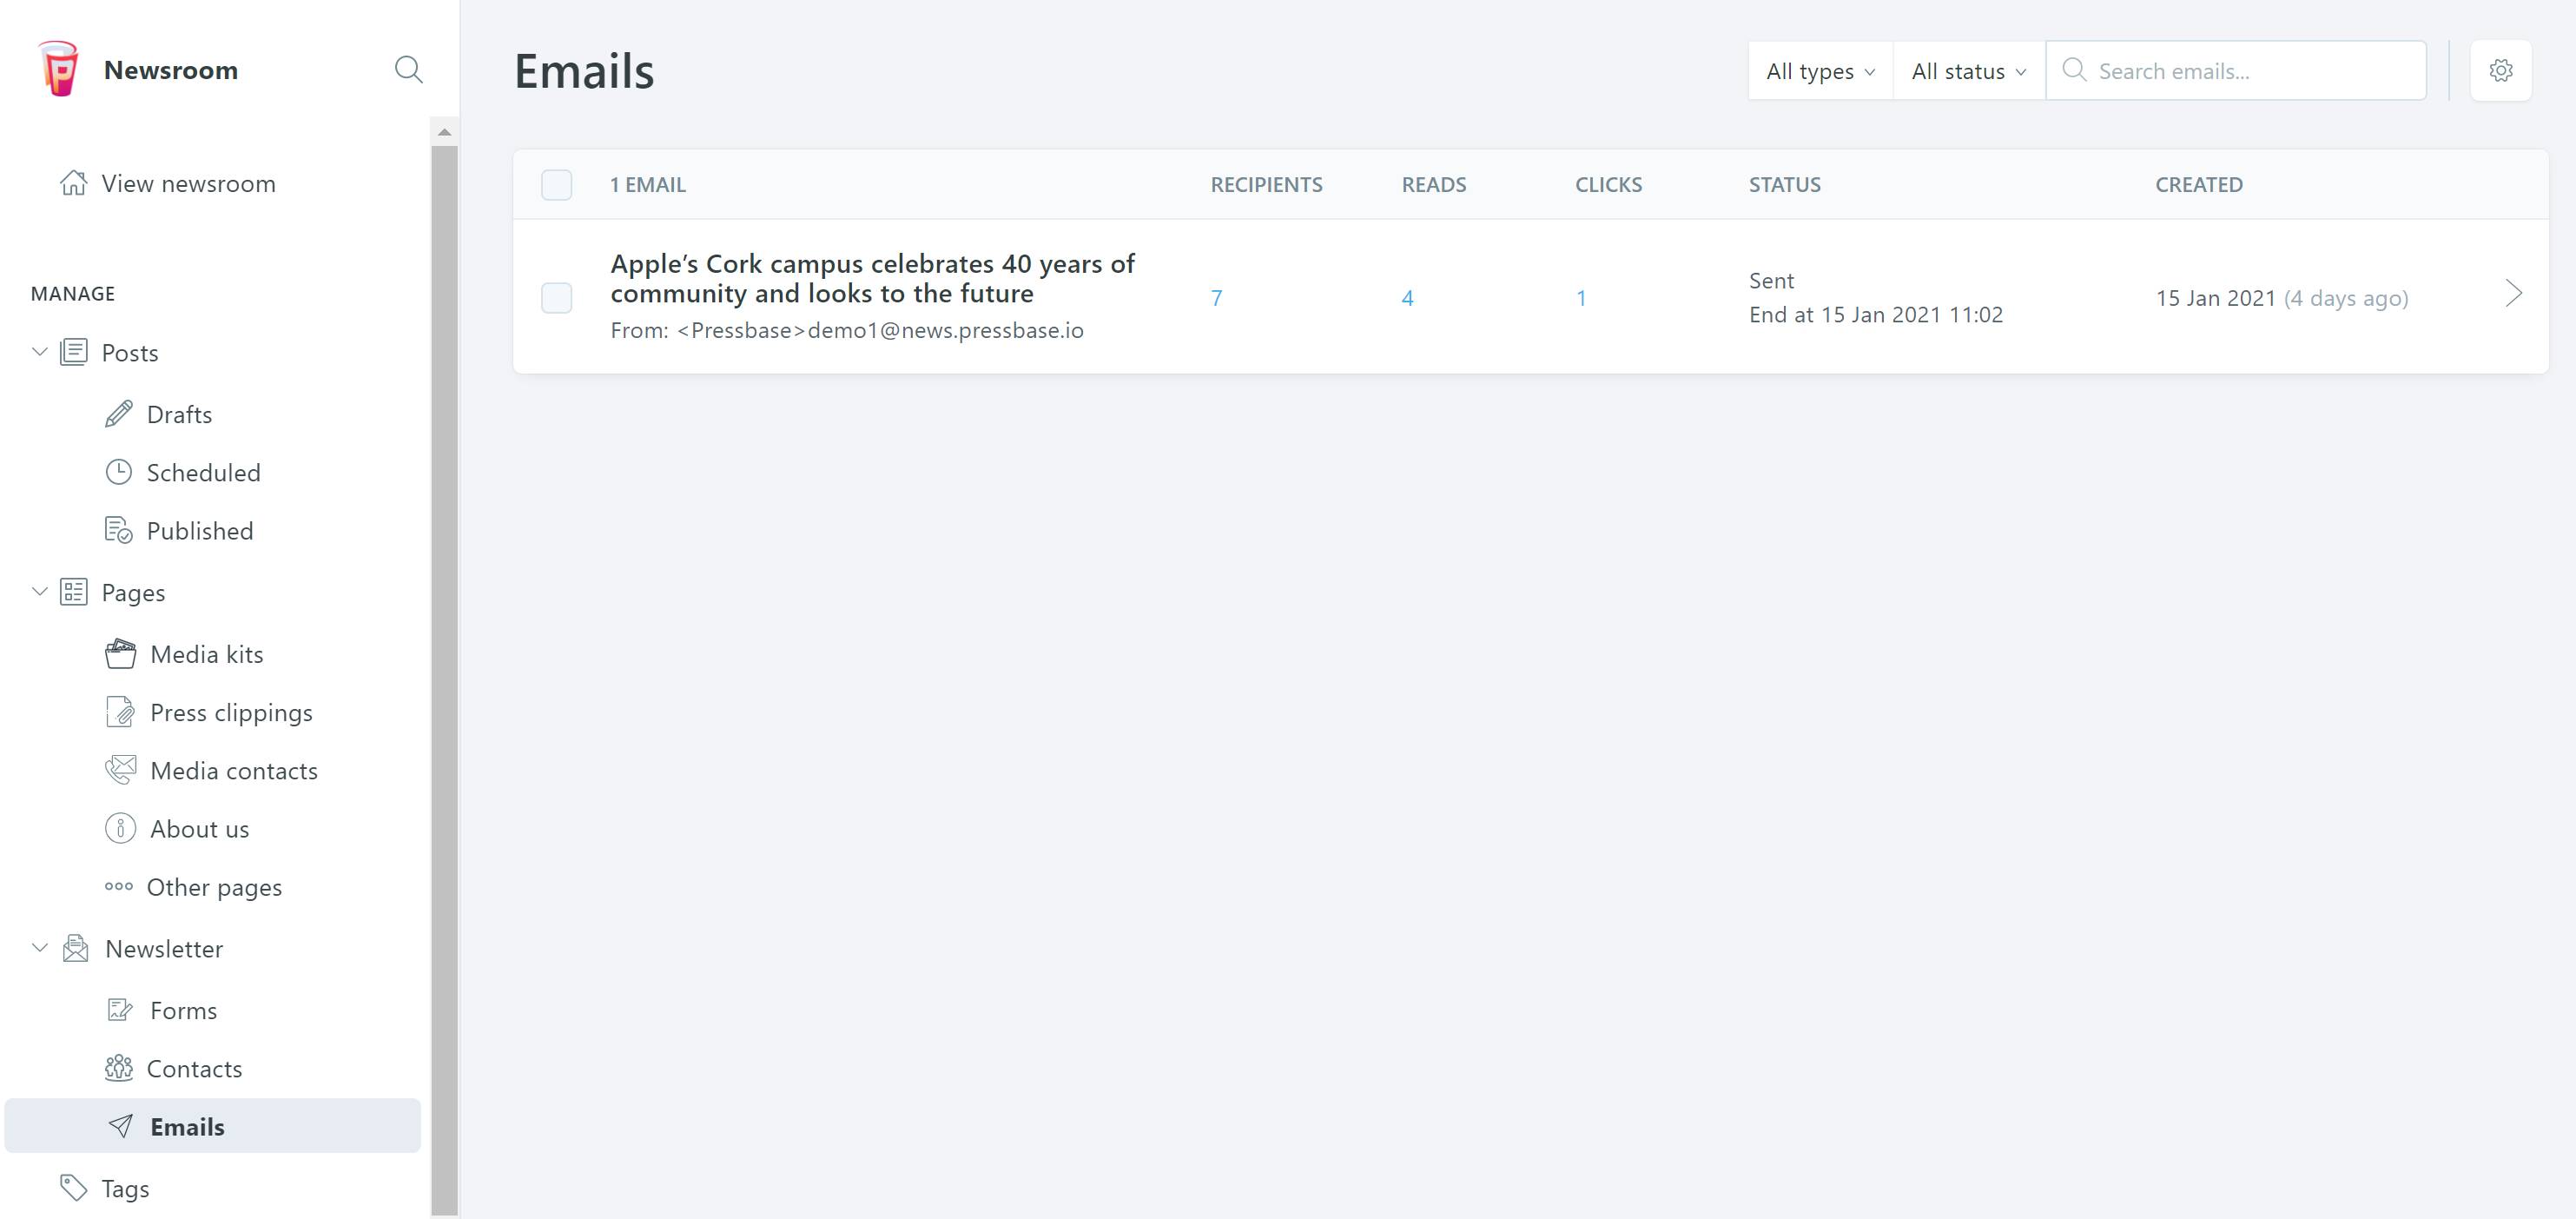
In the detailed view, you can see which subscriber read (opens) or clicked a link in your newsletter. The Status column can help you understand which subscriber unsubscribed, bounced or complained the email as spam.